Let’s talk about Toyhax. I brought them up ages back during my quest to build the perfect Generations Optimus Prime, since their wares were a part of that project, but I never really got into them in detail. They’re a company and product I’ve been in and out of love with over the years, but they’re something I’ve gotten back into lately, mostly thanks to Legacy Laser Prime, and what I felt he lacked. But let’s back up a bit.
Toyhax, formerly known as Reprolabels, is a company that sells stickers for Transformers, and a few other lines, like Power Rangers and GI Joe. Toyhax is technically a “third-party” unofficial production, but they’re far, far older than anything else in that scene, and existed before the term was even around. I’m not sure how long they’ve been a thing (there’s no history on them that I can find), but I first became aware of them when veteran Transformers writer Dave Van Domelen reviewed a sample set of faction insignias waaaaay back in 2001. Looking back at that review, the idea that you used to need to cut them on your own sounds nightmarish. Point is, compared to all the other “third party” stuff out there, they feel grandfathered in.
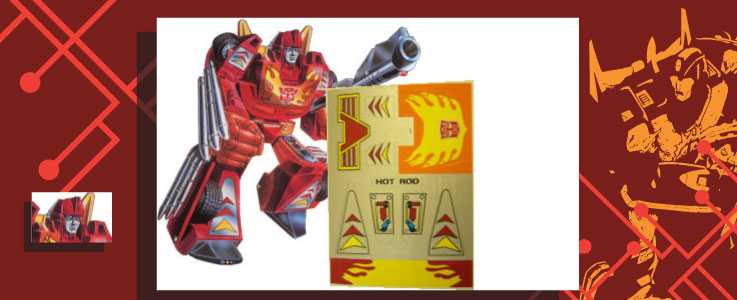
Anyone need their Hot Rod freshened up?
As Reprolabels, the original idea behind them was that they sold reproduction stickers for vintage Transformers figures, so you could restore the ones you had. And they still do that, though it’s a quieter part of their business now. What they really became famous for was their upgrade sets, where they’d make new stickers to apply to contemporary figures, usually to add more detail, and visual interest. Occasionally, they’ll even provide sets that change one character into another.
This Rumble is Red, but you can make him Blue.
I first really got into them around 2011 or so, during the era of Transformers Prime, Reveal the Shield, and the original Generations line. See, around that time, mainline Transformers seemingly got hit by a cost-of-materials increase/budget problem, and the first thing to get hit was the paint budget for a lot of the mainline toys. Figures like Reveal the Shield Jazz, and Prime Deluxes Ratchet and Knock-Out were notorious for how plain they were, and would have things like entirely unpainted back-ends to their car modes.
Reveal the Shield Jazz was business in the front, and budget in the back.
That’s where Reprolabels swooped in, offering sets that restored their missing deco, as well as adding even more color upgrades.
That’s the stuff.
Like I said, though, I’ve fallen in and out of love over the years. Firstly, Toyhax sets feel costly for what amounts to sticker sheets. I do feel like there’s a good reason for the price tag, though (I’ll get into why later), but sticker shock (ha!) is real. Secondly, there’s the fact that, at this point, basically every major Transformers figure that gets released gets a Toyhax kit made for it, whether or not it really needs any kind of deco upgrade, with some kits feeling kind of superfluous, and even excessive, slathering every surface with tons of detail.
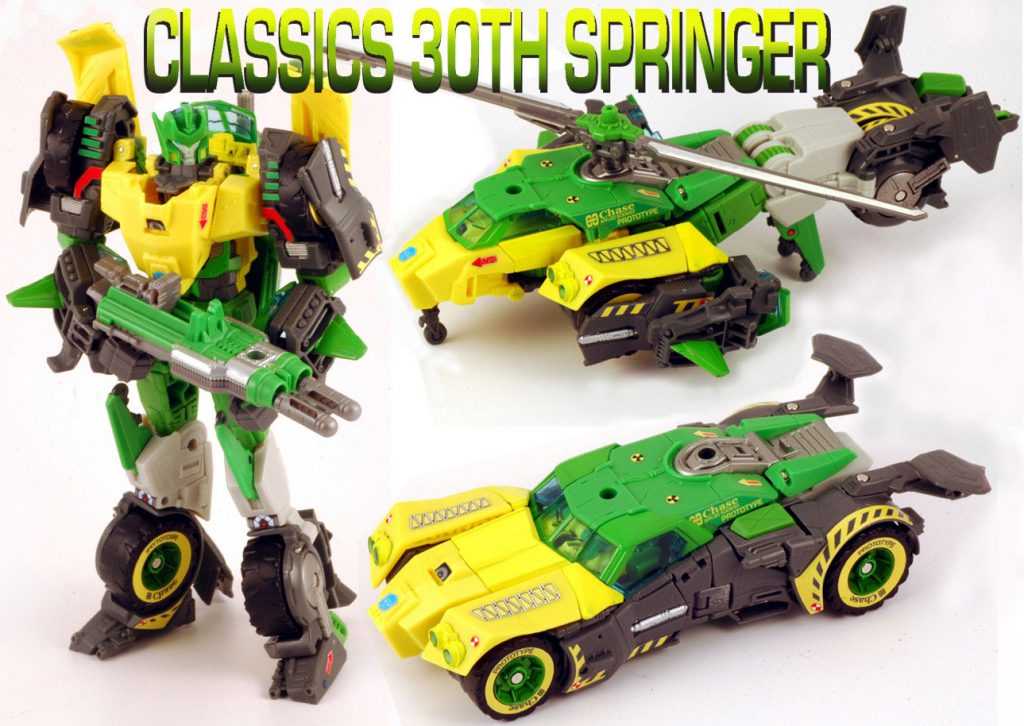
Thrilling 30 Springer, a figure that felt adequately colored pre-labels.
The common counter-argument to that is that the kits aren’t being produced with the idea that you’ll apply every sticker, just the ones you like, though that underscores questions of price versus value, if you’re not using the whole buffalo, so to speak.
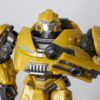
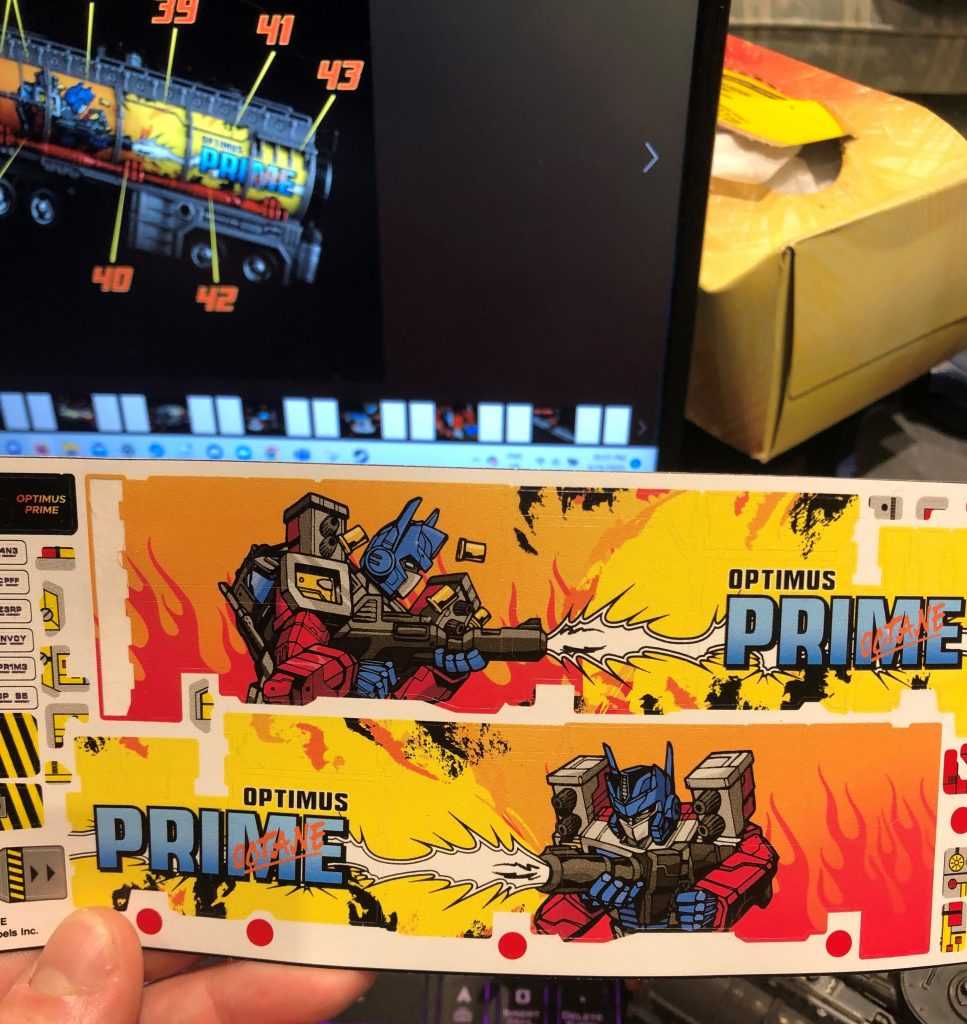
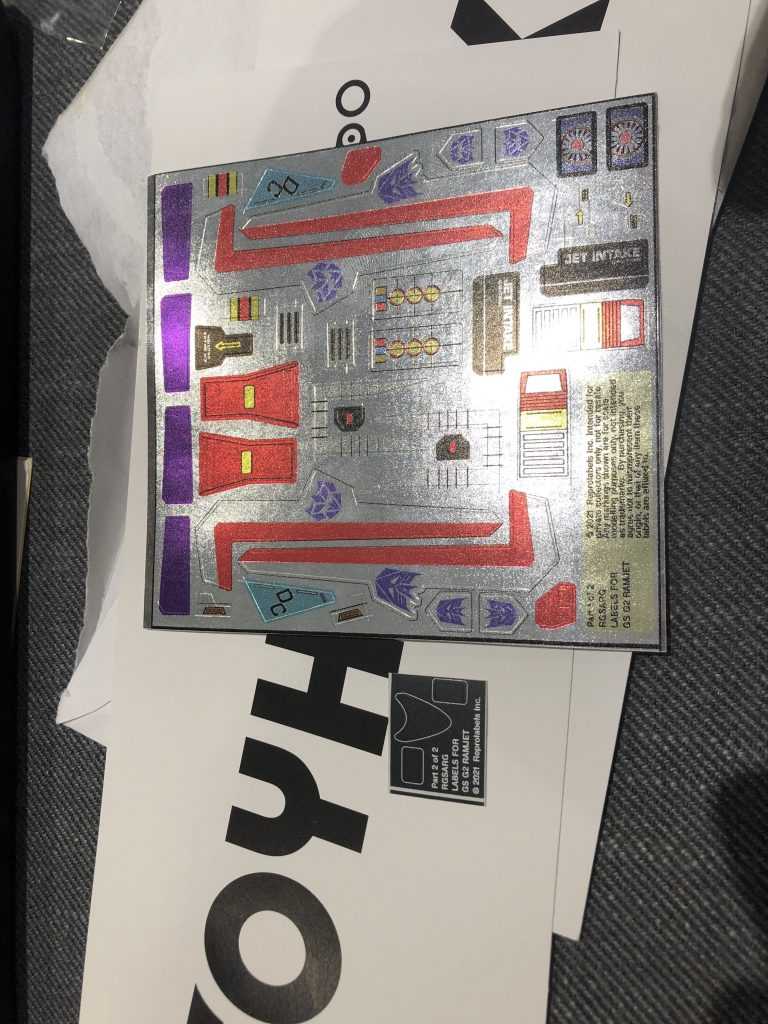
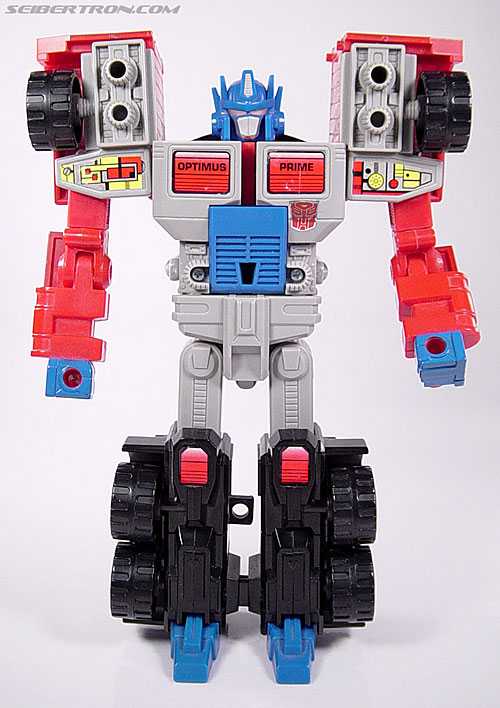
But, anyway, as I mentioned during my Legacy Laser Optimus Prime review, he was missing a lot of color detail from the original G2 figure, including the mural on the sides of his trailer, and wouldn’t you know it, Toyhax made a kit for him that restores it (retailing for $30), along with a bunch of other G2-figure-specific details. So, I wound up taking the plunge on it, and while I was there, picked up an upgrade kit for Generations Selects G2 Ramjet (retailing for $10), another figure I’d found a bit lacking in the reproducing-the-original-figure’s-details department. So, let’s see if I can’t fall back in love.
Applying a Toyhax kit
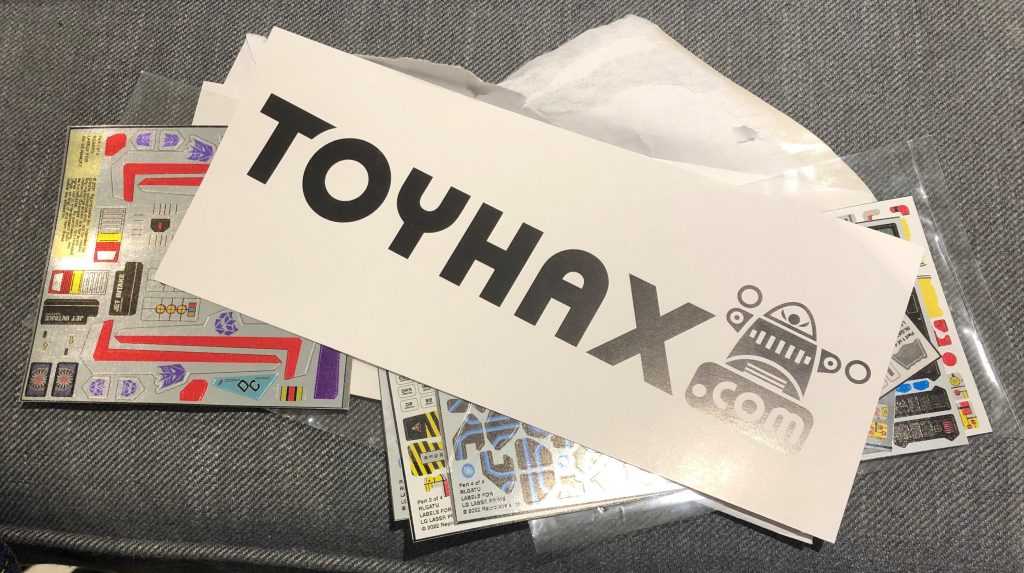
What came in the envelope.
Each Toyhax upgrade set nets you a few sheets of stickers. They’re unlabelled, though, and come without instructions, so you need to go online both to get the numbers of the stickers, and see where to apply them. I strongly suspect this is a way to avoid HasTak’s ire, and it just means I have an open laptop whenever I’m stickering figures.
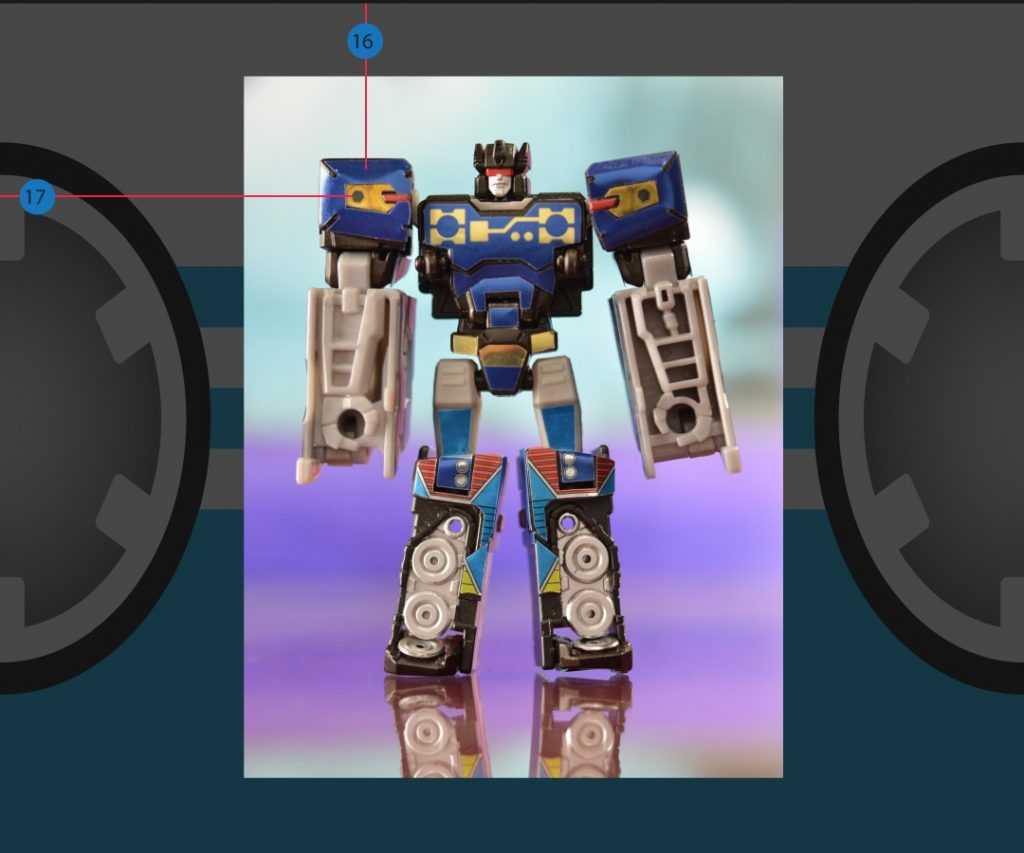
As seen in the background here.
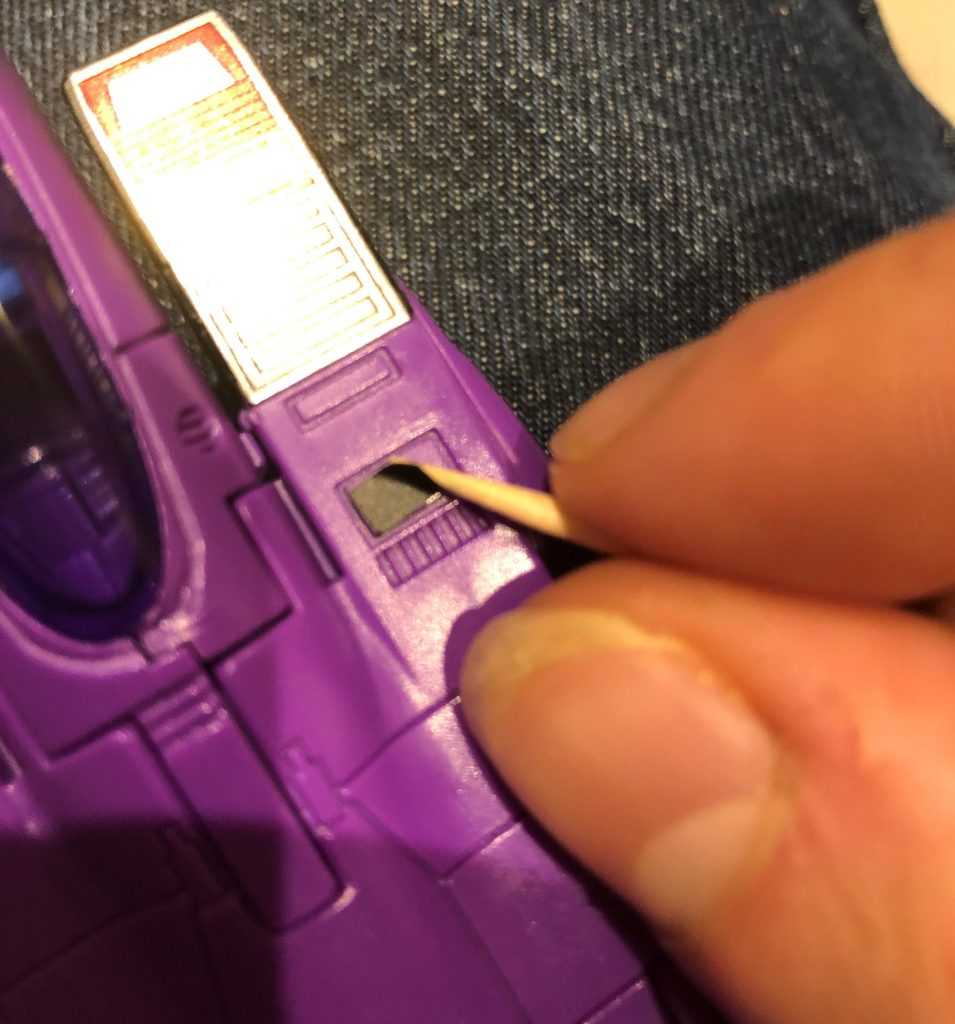
In terms of what you need to do, you need to make sure to bring one thing with you: A pack of toothpicks. They’ll be your best friend during the entire process, serving multiple roles.
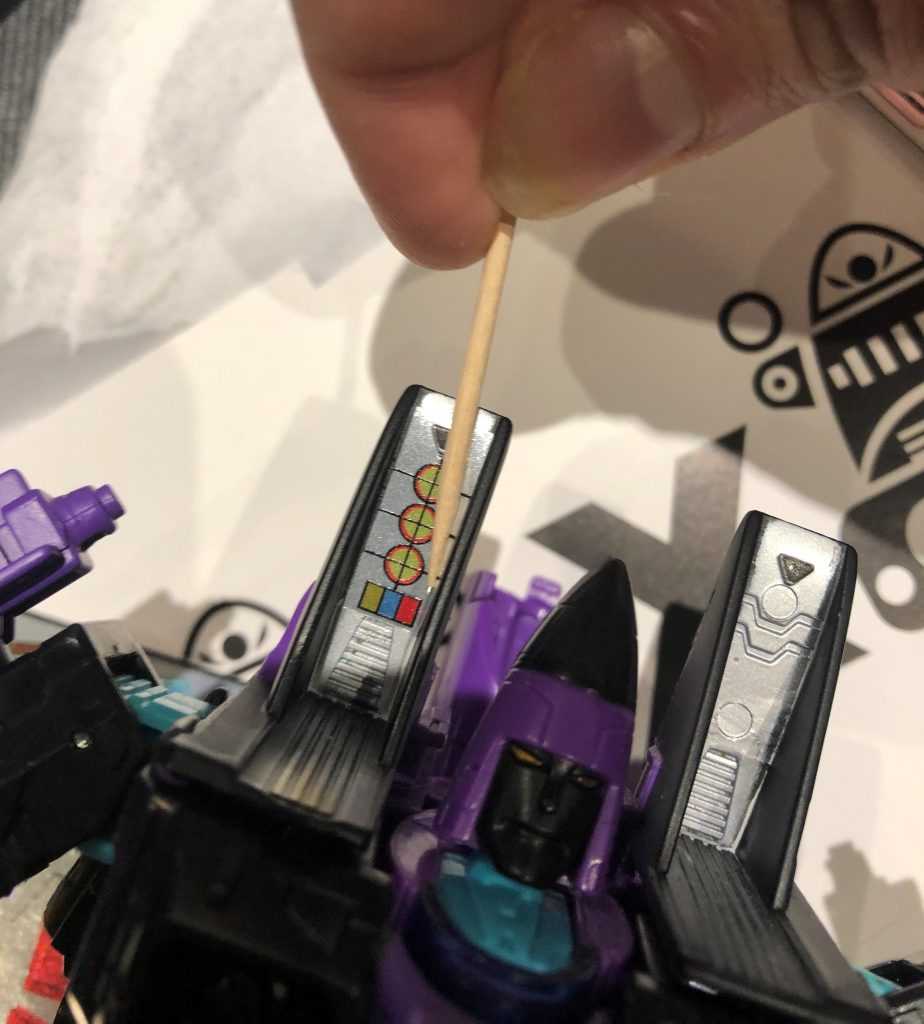
One role of many, the smoother-downer.
You can use them to hold, and apply little stickers, to carefully adjust them, to press them flat once you’ve gotten them in place, and, if you make a mistake, to help peel them off again.
Going for a mulligan.
And that’s the big thing about Toyhax stickers, something that partially justifies their price: They’re way more durable than HasTak stickers, where you get one shot to apply them right, and removing them will rumple and shred them. Meanwhile, modern Toyhax labels are durable enough that, so long as you’re careful around the corners, you can peel them off and reapply them if you didn’t get them on straight.
I really goofed this one.
My preferred technique is to gently place a label down, adjust it with my finger or the toothpick, and then, once it’s in place, use the toothpick to press it down hard. Basically, as somebody with fumbly, inaccurate hands, I appreciate that mistakes are easily fixable.
Like this sticker I dropped on his leg.
That being said, both these sets are fairly idiot-proof when it comes to getting stickers straight. Basically, they’re cut and engineered so that there’s always an obvious place for them to fit. At the very least, they’ll conform to sculpted lines on a figure’s surface. Often, they’ll fit around sculpted details. Lining them up is fairly intuitive and painless.
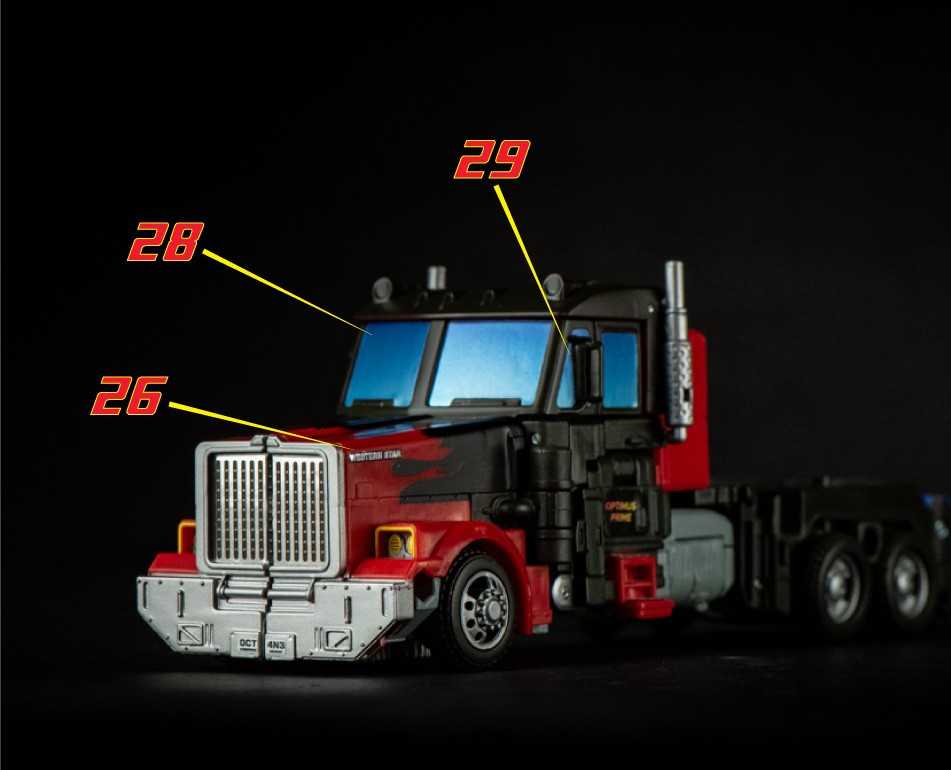
Ramjet’s Upgrades
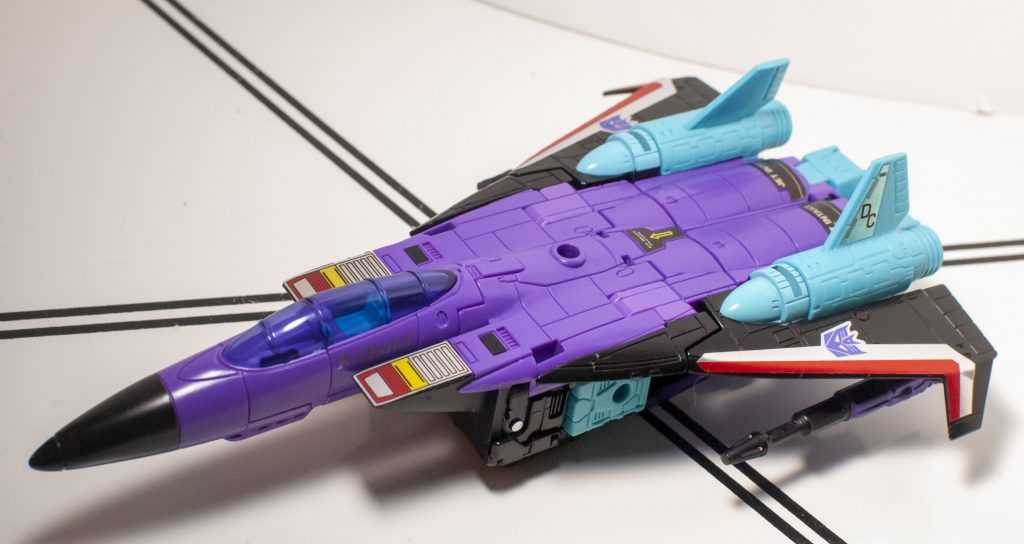
What I started with.
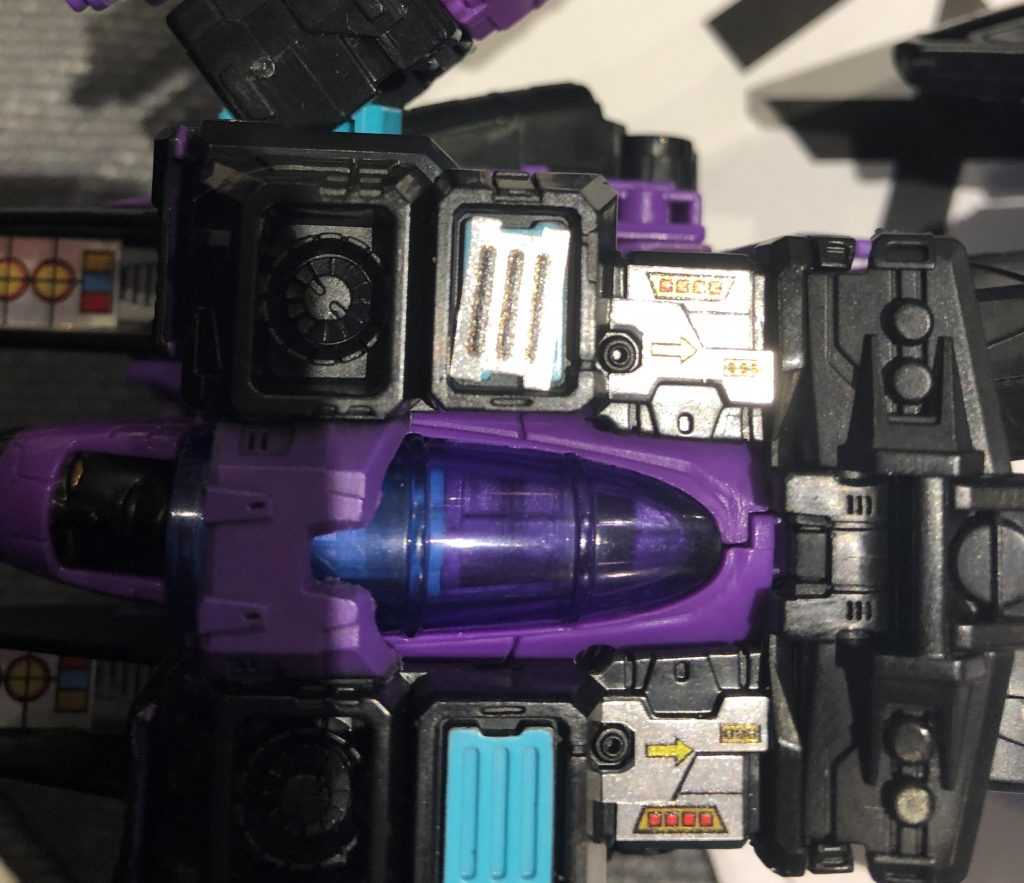
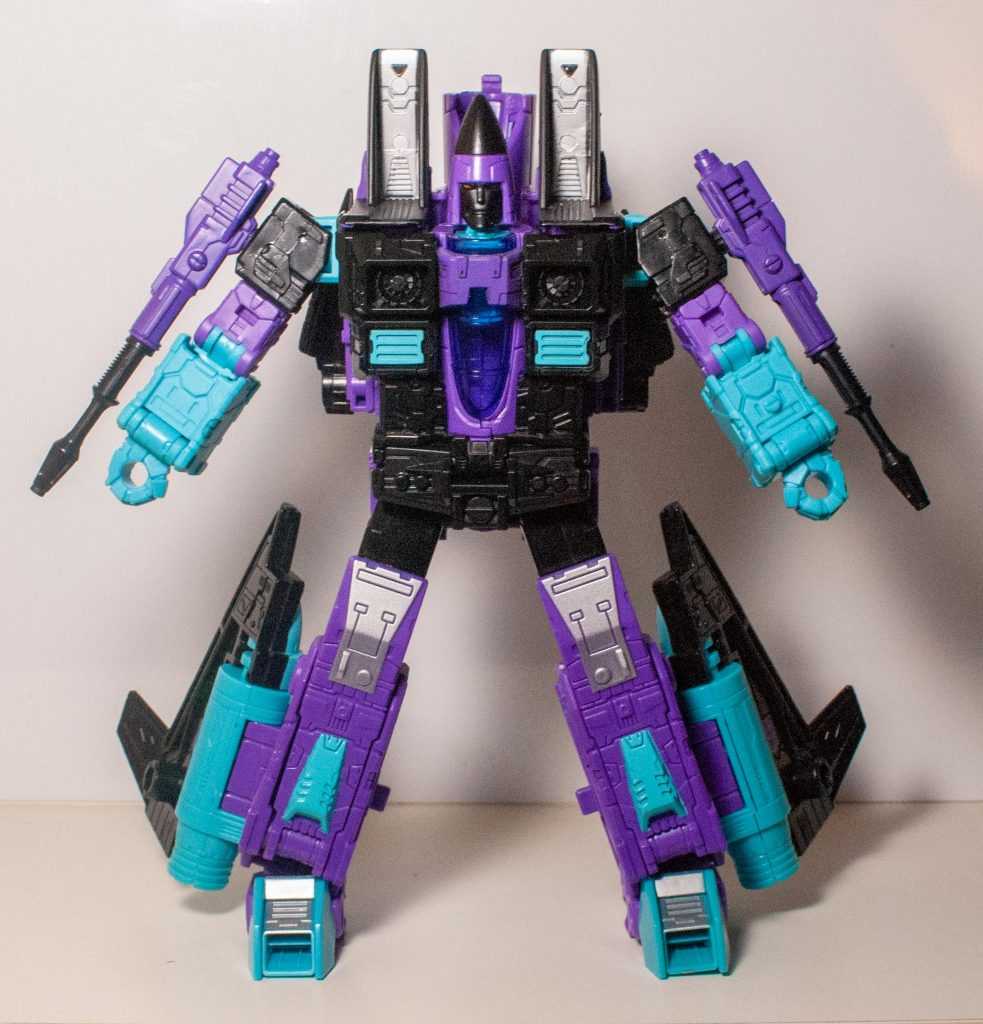
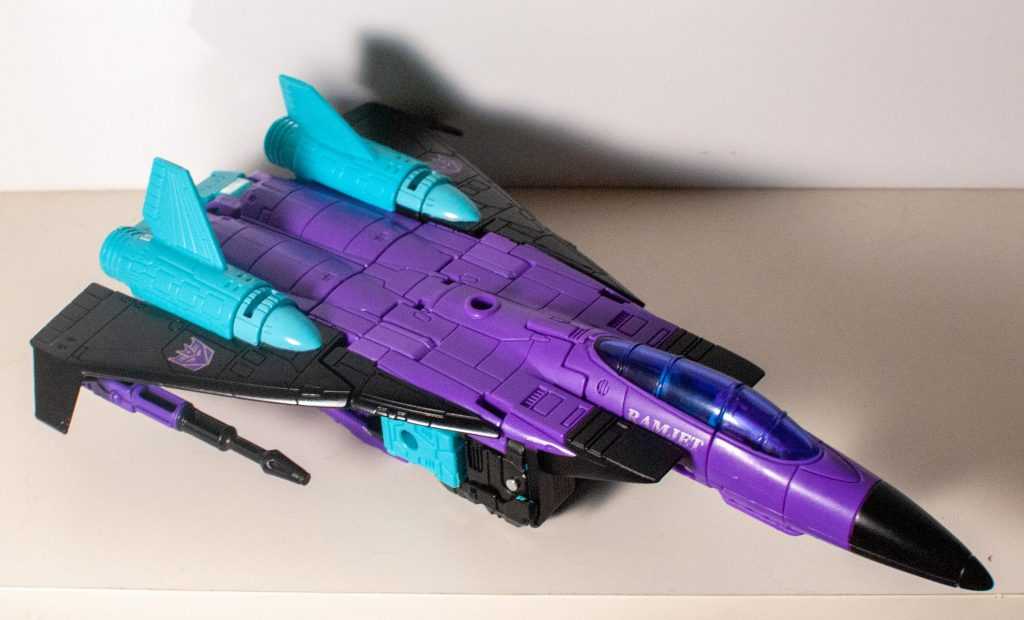
Ramjet’s a mild kit by Toyhax standards, coming with only one medium-sized sheet, and an extra small sheet. The whole thing only took me about an hour and change to apply. The kit mostly exists to put details back on him based around stickers and paint from the vintage Generation 2 figure, that this update didn’t include. This vexed me at the time, especially since the older Collector’s Club update had included a lot of those details, so I’m glad to see them brought back. In robot mode, details are added to the lower legs, chest, shoulder pylons, and arms, while in jet mode, details are added to the wings.
Before.

After.
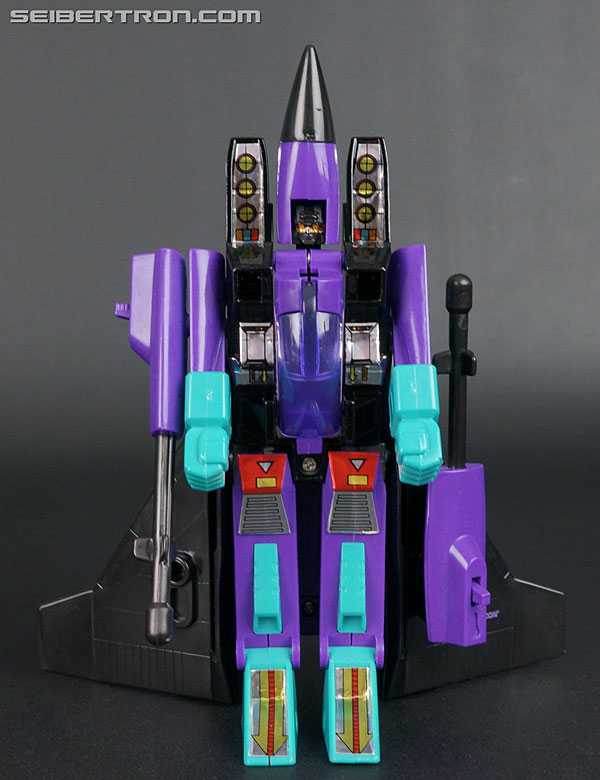
The original.
In terms of which stickers I used, it wound up being more than I intended.
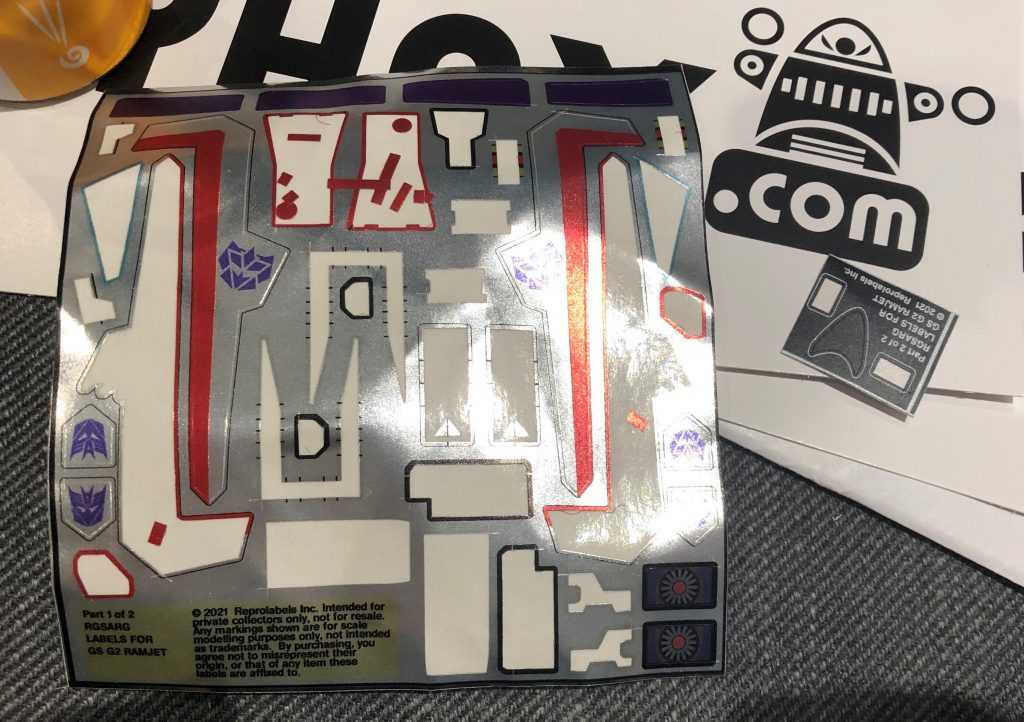
The sheet, when I was done with it.
I was originally going to leave off things that weren’t strictly classic toy-based details, but I wound up applying most of the set.
Before.
After.
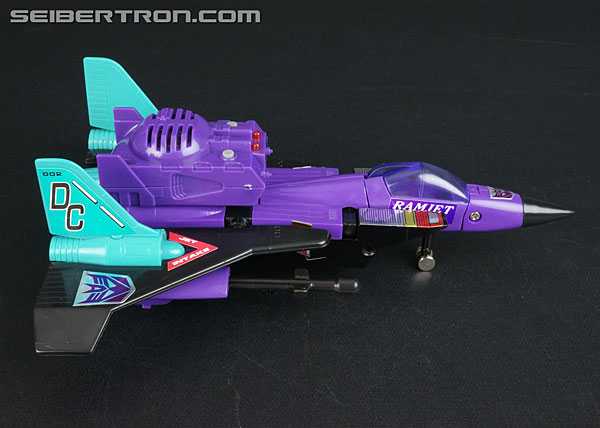
The original.
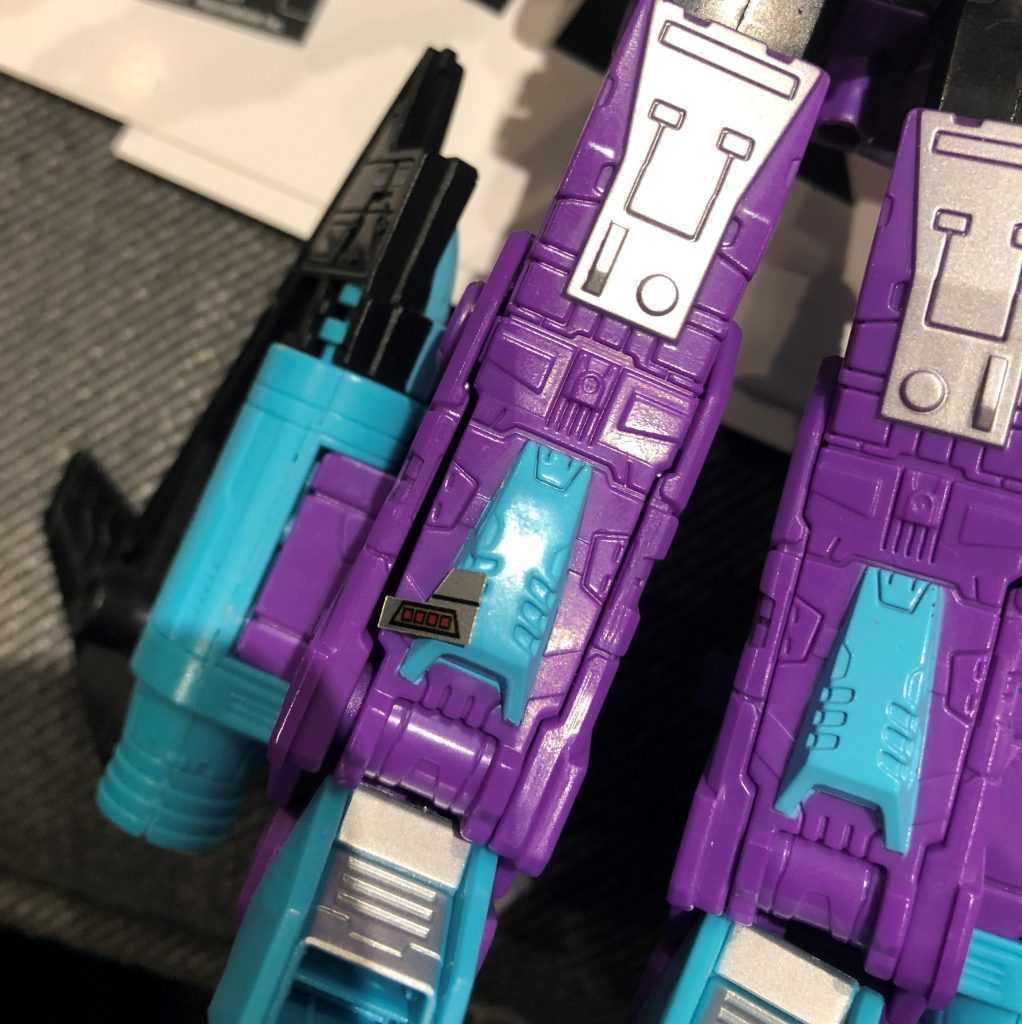
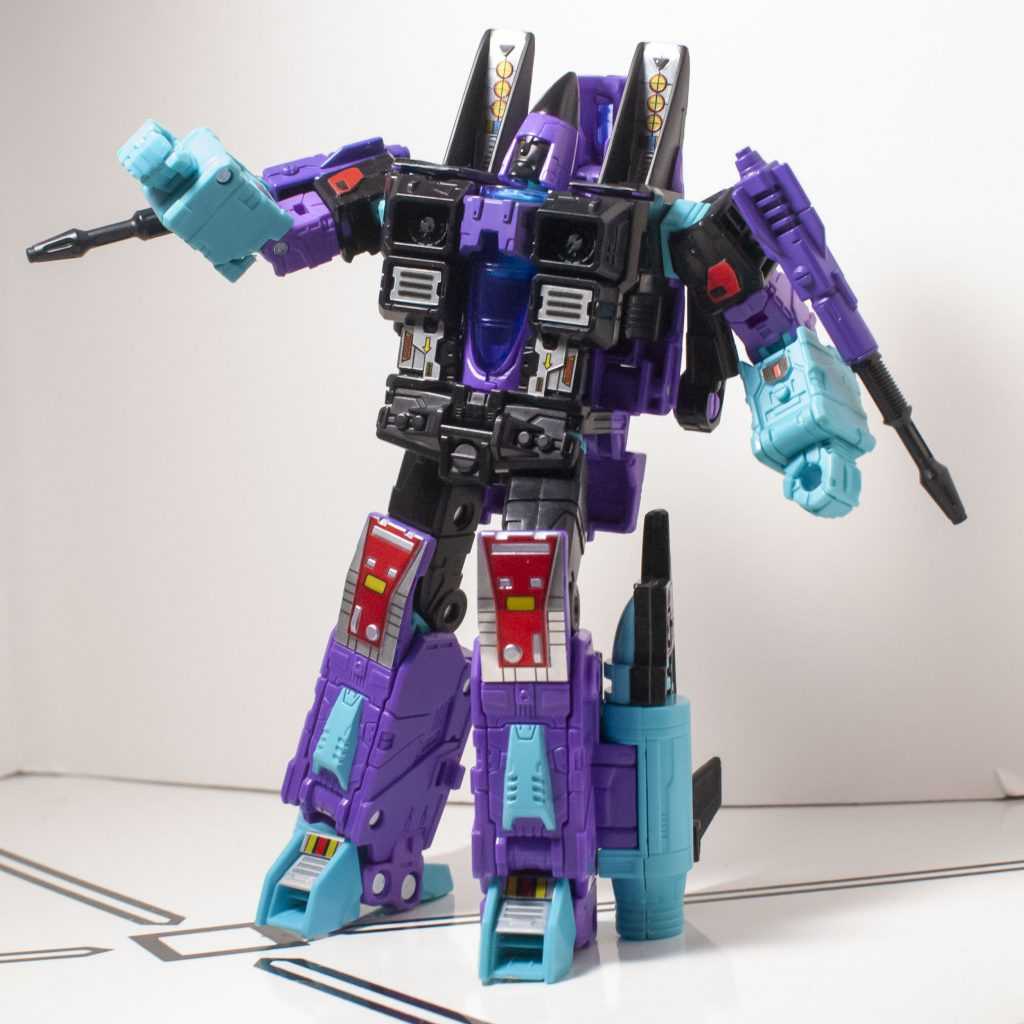
The details added to his robot-mode arms are partially based on the Collector’s Club figure, but more importantly, add a pop of metallic color that equalizes them with the rest of his newly-metallic body, and he felt plain without them.

Showing off the guns.
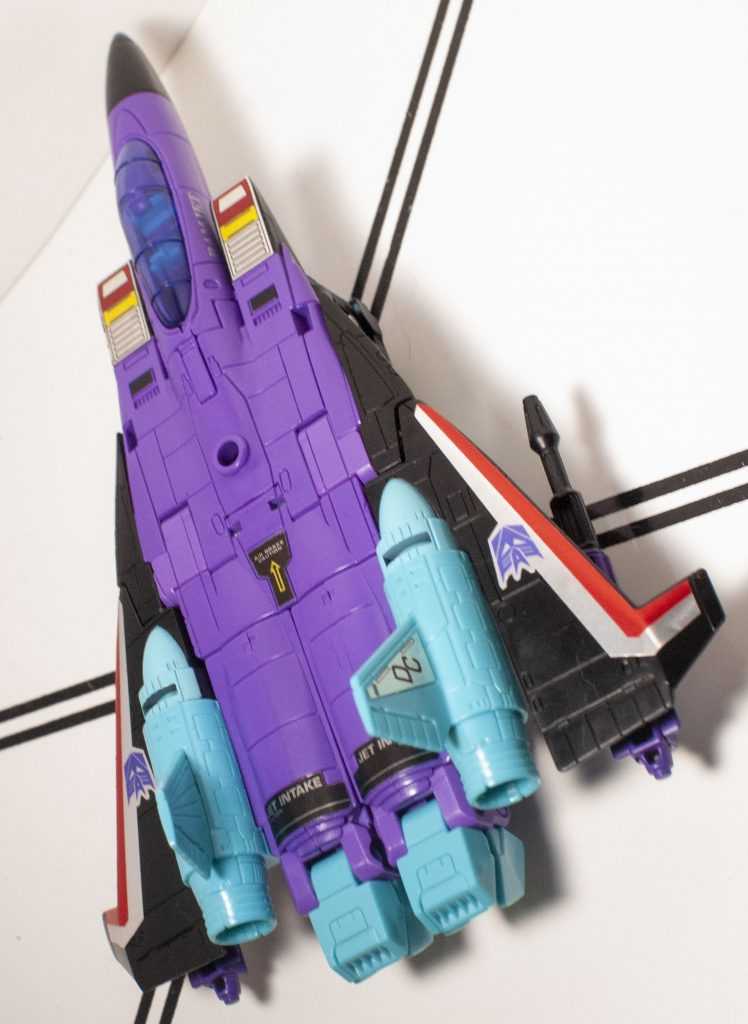
Meanwhile, the black details added to the jet body add another good pop of color, so I went with those, too.
A shame there’s no soundbox-tank-thingie.
Basically, all I left off were stickers beneath his shoulder pylons (they went over sculpted detail anyway), some purple trim on his wings (not present on the original, and too close to the edge of the wings for comfort), and a couple other small things.
Not that he needs them.
And the end result looks pretty good! It adds the little bits of detail he was previously missing, doesn’t make him look to busy, and adds more G2 vibes.

Pictured: Vibes.
Overall, the whole thing’s simple and straightforward enough to feel like a good starter set if you’ve never Toyhax’d before.
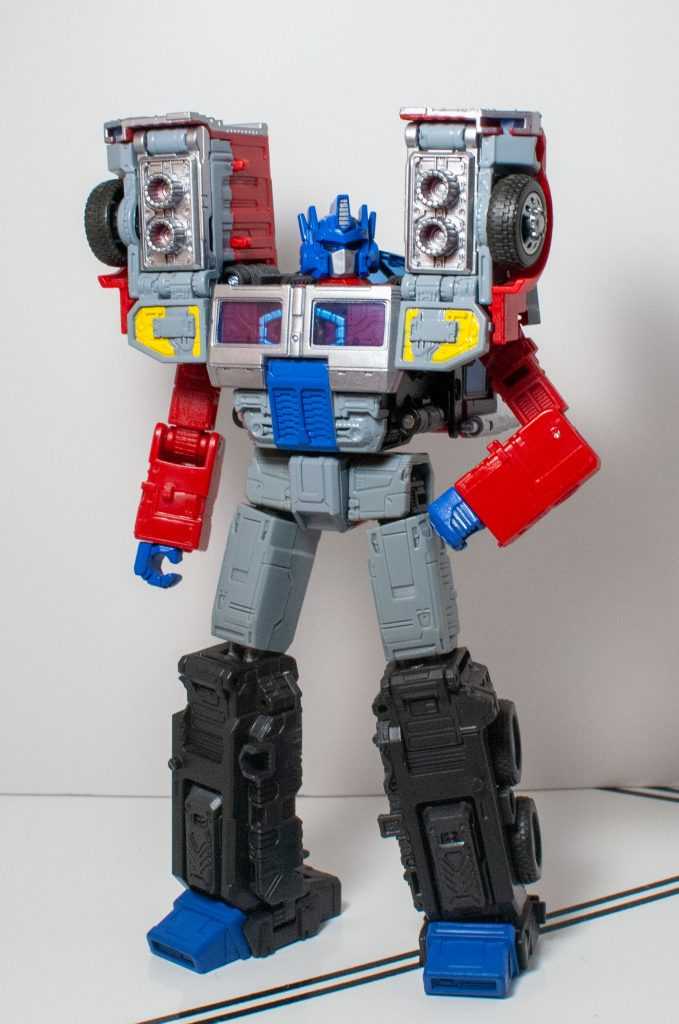
Laser Optimus Prime’s Upgrades
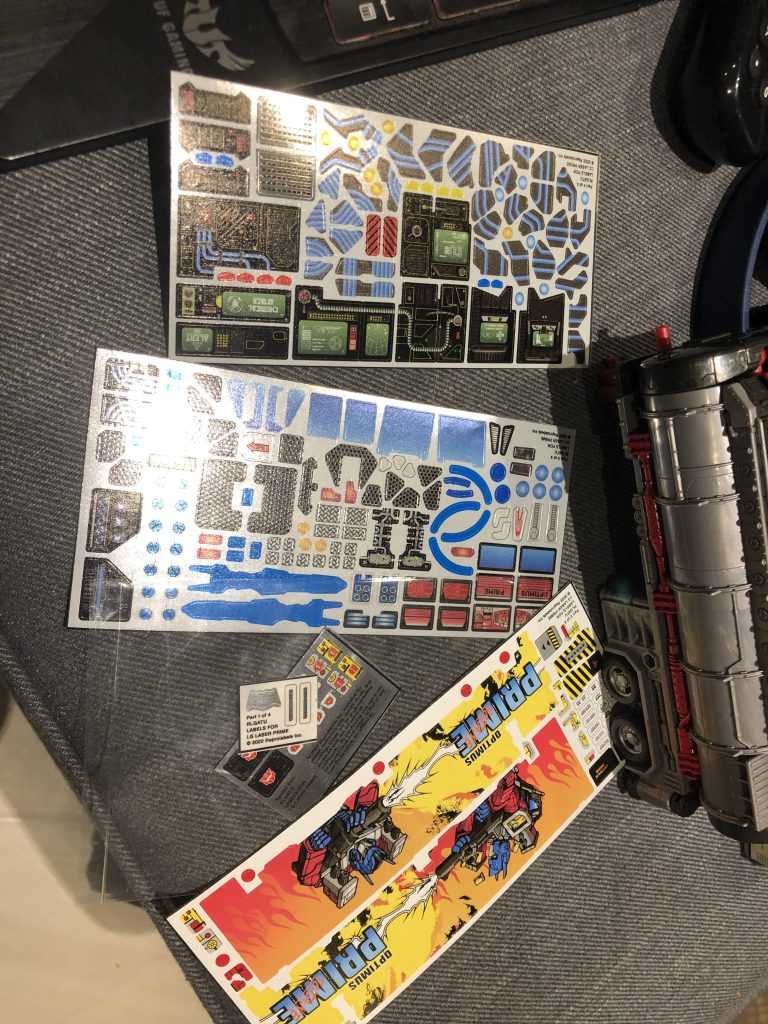
Three sheets, plus a couple smaller addendums.
Laser Prime’s kit, for contrast, is wayyyy more elaborate, and took way more time and effort, spanning two evenings.
The amount of options just for his truck’s plates.
It starts with a multi-part mural for both sides of the trailer that goes on in little chunks (and I appreciate, again, how well they fit around the sculpted detail there). It then moves on to smaller details. There’s a lot of optional parts on this kit, letting you make it look like the G2 original, the 2002 reissue, or something more unique. Me, I went with the G2 original-style labels.
The look I was aiming for. I have no idea what’s up with that Autobot symbol on his chest, the ’95 one I had didn’t have that.
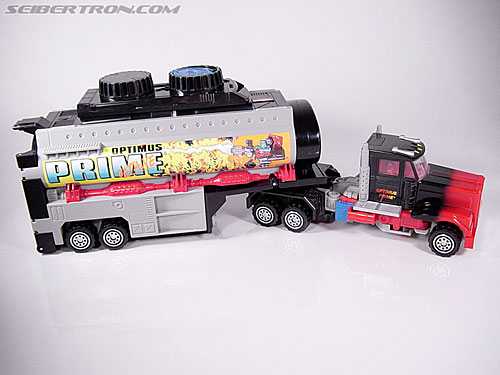
That all-important mural.
I also left a lot more labels off of this guy than I did with Ramjet. The stuff I omitted included printed honeycomb detail over sculpted detail, a silver mouthplate to go…over the silver mouthplate, little eye stickers (which make sense, but I already painted the eyes on mine), window stickers to go over the clear windows, and a few other random, superfluous details.
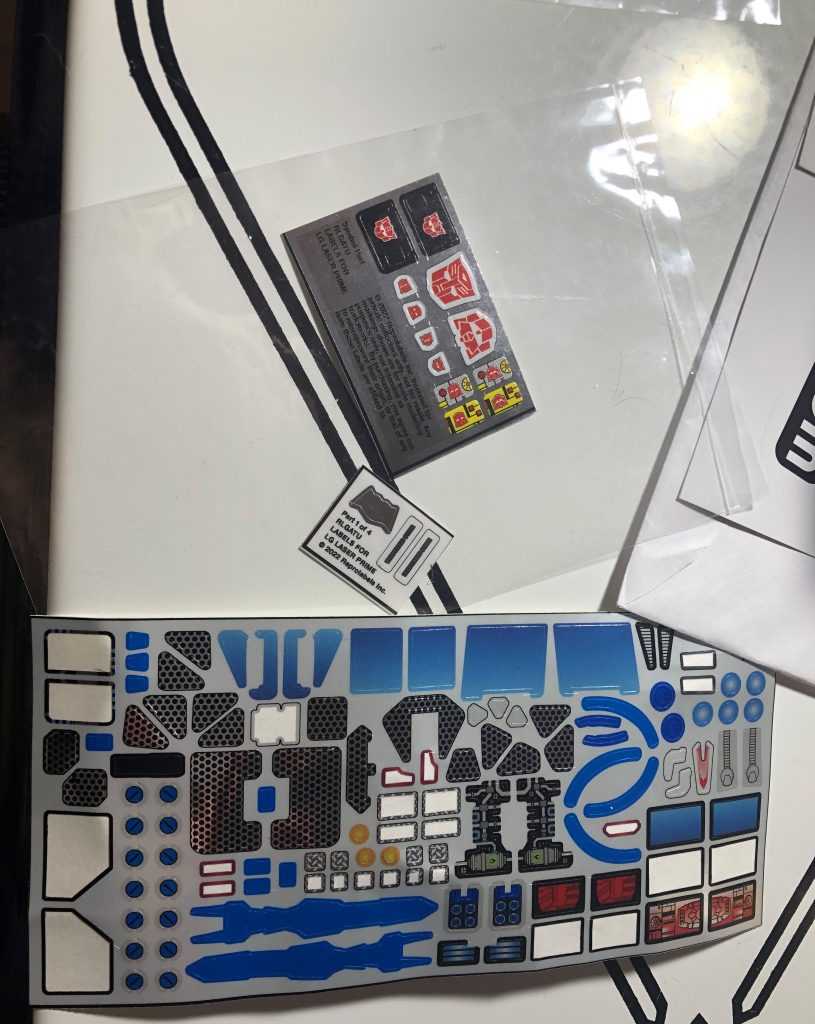
The other two sheets were mostly all used up, it’s these ones that were mostly untouched by the end.
Most critically, the kit really wanted me to put opaque stickers over his transparent weapons, and I just didn’t think that was a good look.
Yeah, no.
I had to break out a second tool for this guy, eventually, too: A pair of tweezers. See, he had some incredibly small stickers that went into some incredibly small spaces, including the “wire” details inside his trailer, and tiny stickers on his shoulders, so I wound up using those tweezers to hold and place them, along with the toothpick.

A delicate operation.
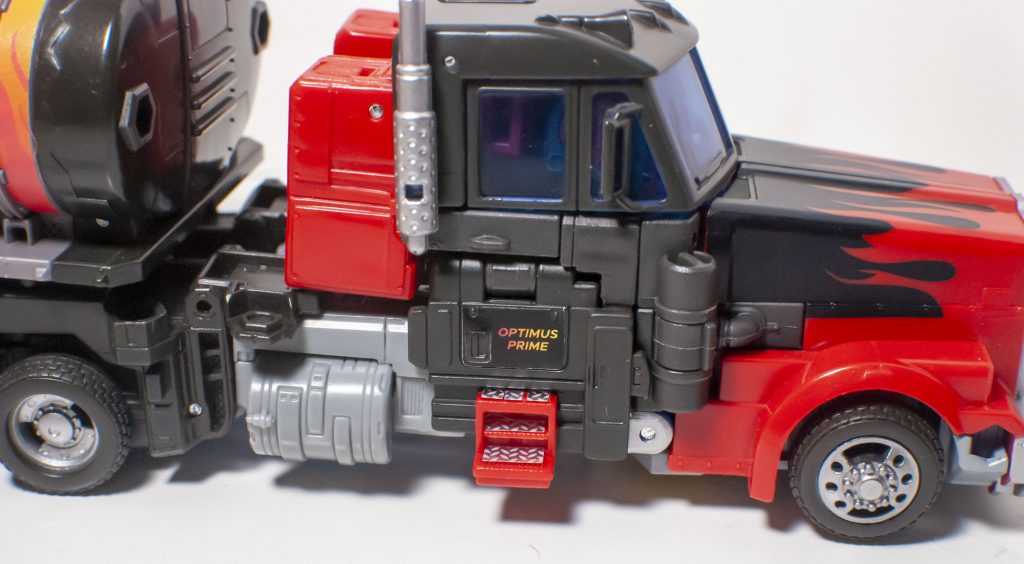
Speaking of his shoulders, those were by far the most challenging thing about this kit, since each shoulder consists of a whole pile of tiny stickers that need to be individually applied, and the instructions aren’t super clear on what goes where (they’re all labeled with the same number). It took a lot of squinting at the website’s official images to figure it out. The end result, though, is an incredibly glow-up.
Before.
After.
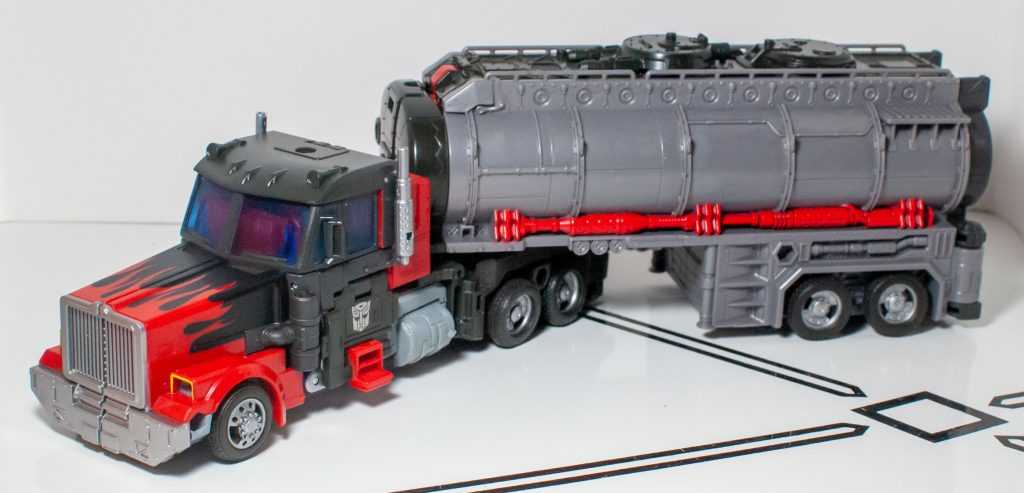
In vehicle mode, he’s got the mural on his trailer, looking excellent.
Before.
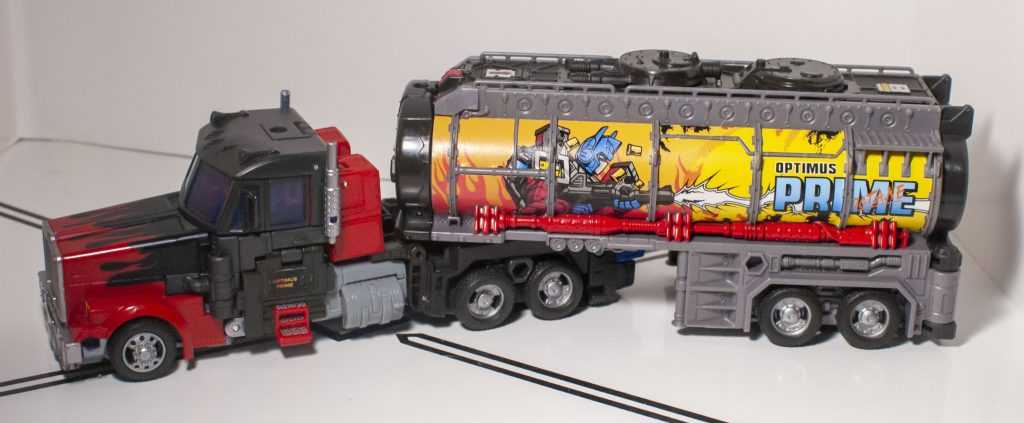
After.
He’s got a license plate and running lights on the back, and labels on top replicating toy stickers.
I went with the original figure’s plates.
On the front of the trailer, he again has the silliness of including “Optimus Prime” on the sides, as well as tiny silver stickers replicating the platforms beneath the doors on the original.
The mural already announces him, so why not go all in?
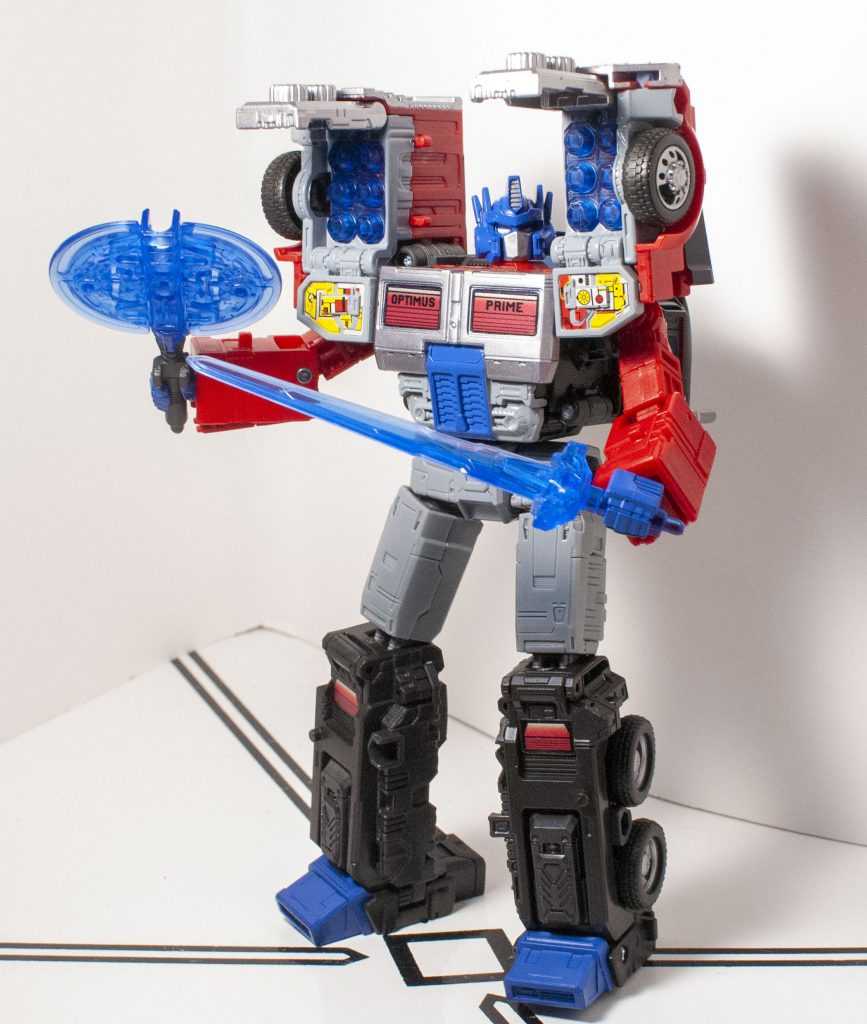
In robot mode, he’s got those elaborate shoulder decals that exist to replicate singular stickers on the original, the “Optimus Prime” pecs, and those red bits on his knees.

Those shoulders were a pain to apply, but worth it.
But it’s the trailer-base that’s got the most elaborate stickering, including those wire bits on the bottom, a ton of computer readouts on the back, and, most amusingly, flat replicas of his missing weapons on the front.
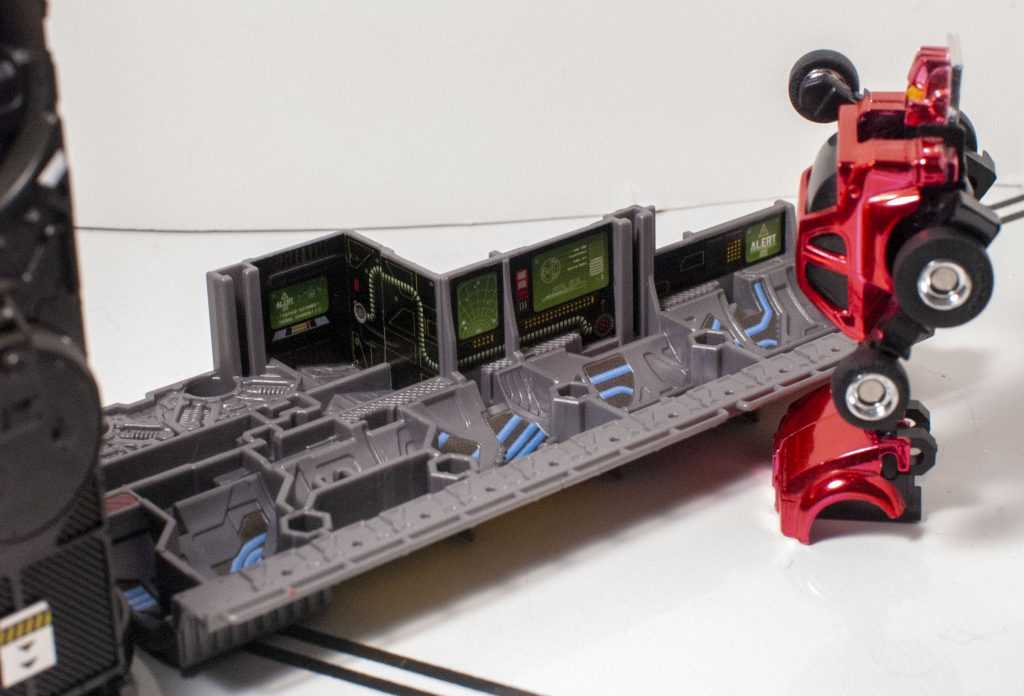
Hubcap checks the monitors.
Windbreaker tries not to step on the wires.
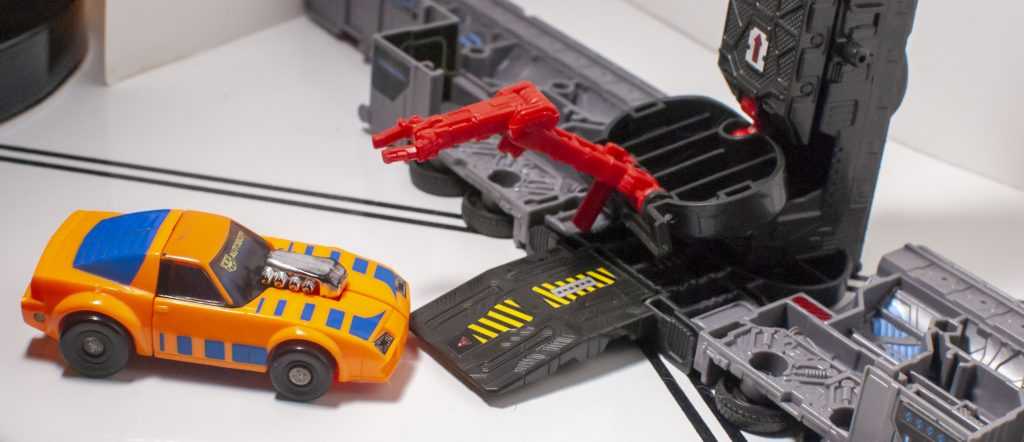
The new stripes help guide cars in.
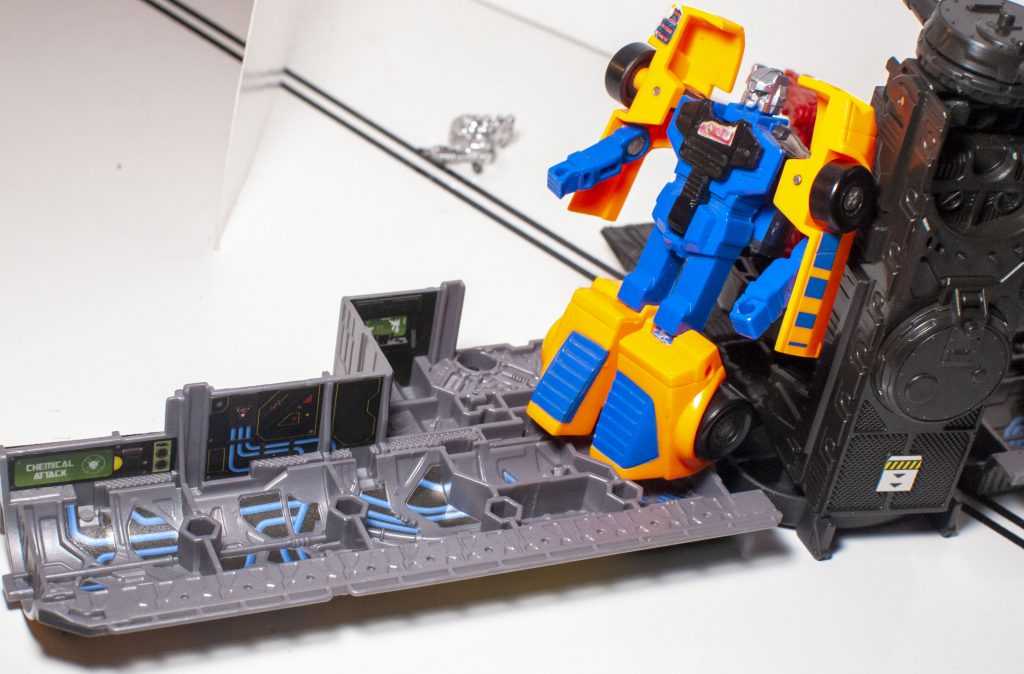
Quick, get behind the miniature, flat disc launcher!
I don’t know if it all makes up for those weapons not being present, but it goes a long way to making the whole thing look way less sparse.
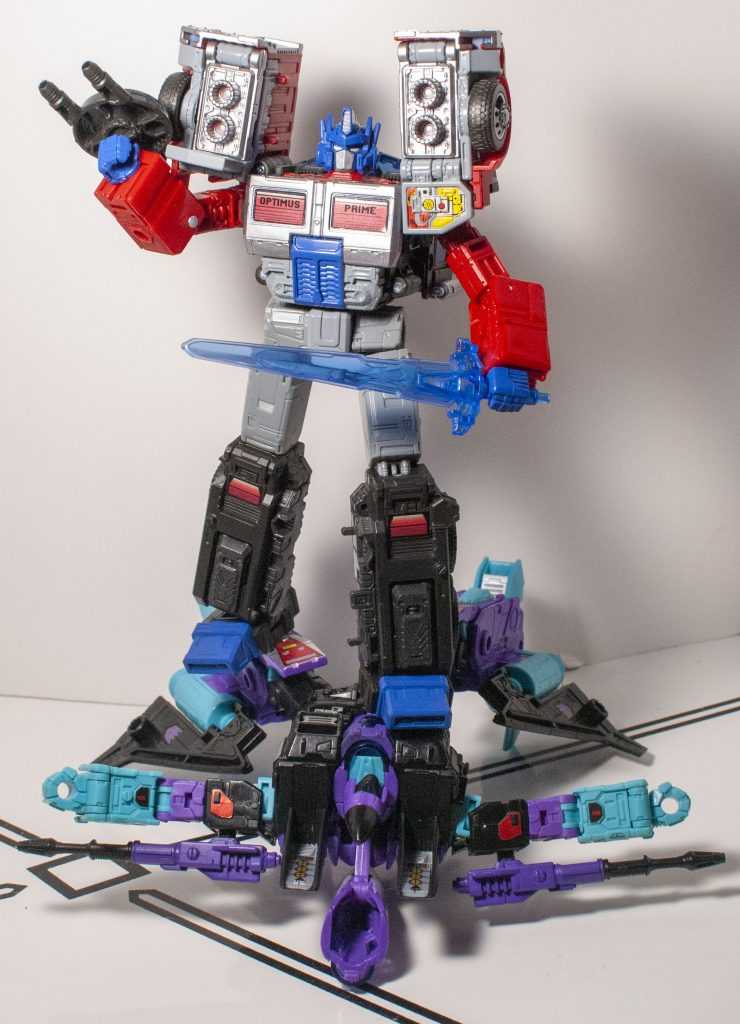
Ready for battle!
Overall, if you’re willing to put in the effort, the results really make this figure sing, and make me like him a lot more.
“I think we got him, guys.”
Toyhax Overall
Yes, it’s kind of pricey for sticker sheets. And yes, some kits are a bit excessive in scope. While I very much think it’s a case-by-case basis with this company, these two are good ones that enhance and fill in the missing bits on these figures. Plus, broadly, between the durable stickers, and the well-engineered way they fit onto the figures, there’s a quality here that really makes them fun to work with, sort of like putting together a model kit.
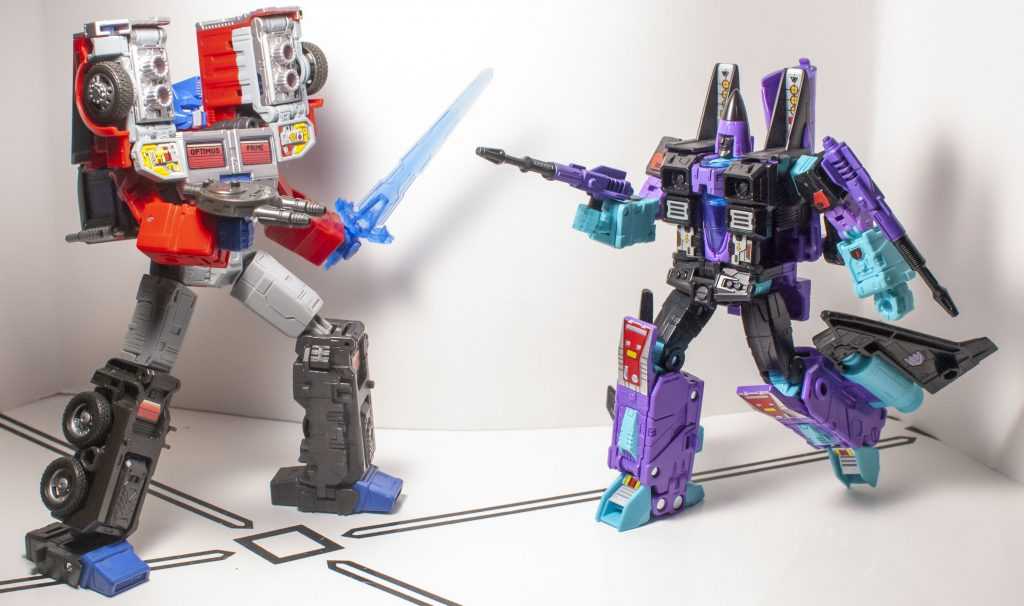
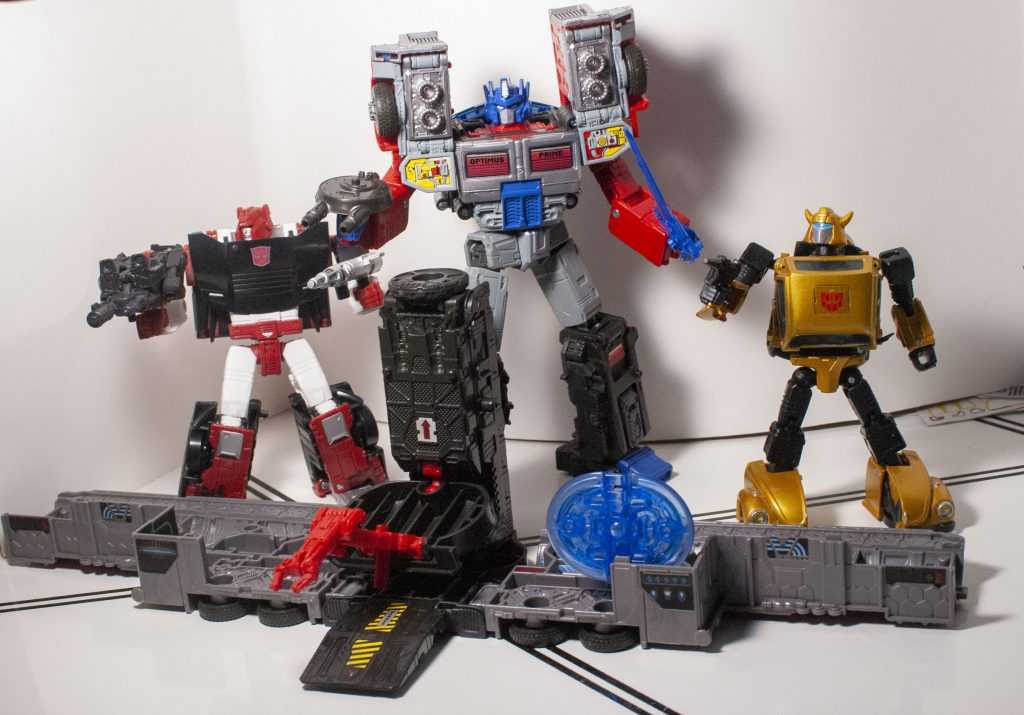
Surely, this time, the Opening Credits Battle will go better.
So, if you’ve got a HasTak release that you think needs a bit more paint, root around their site, there might just be a kit for that.
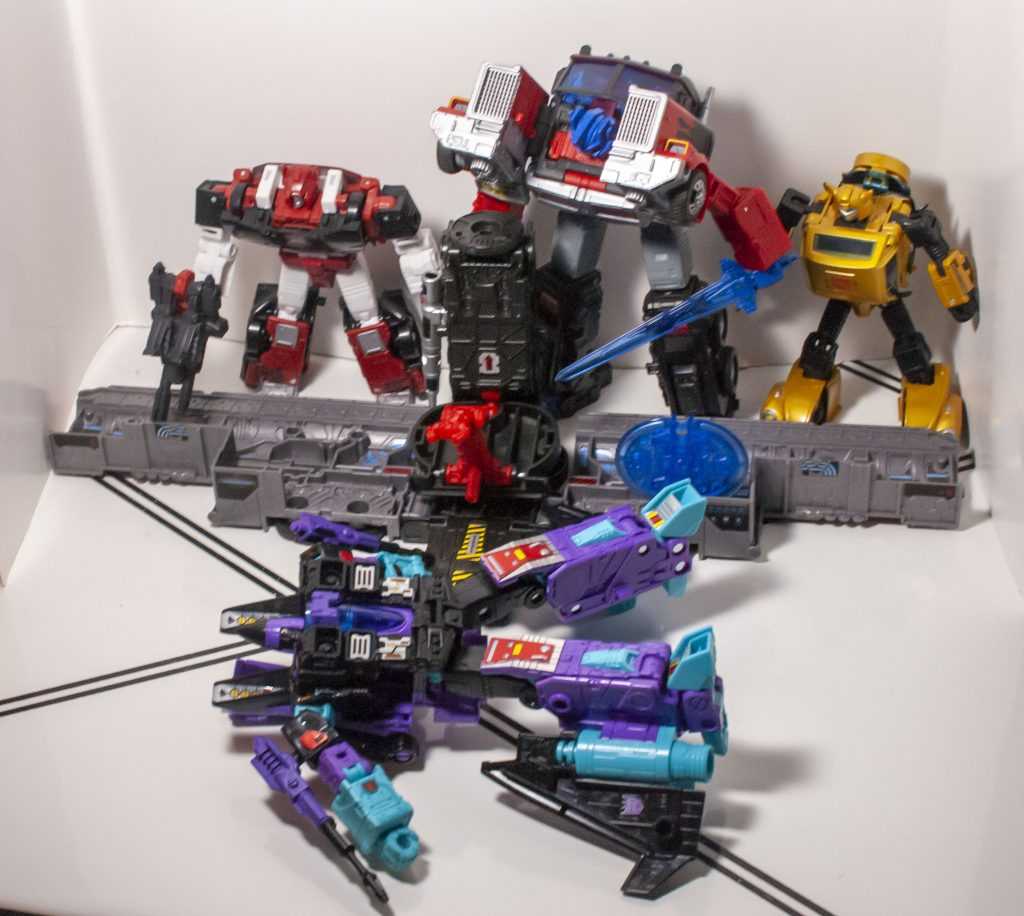
But there isn’t a kit that’ll make Ramjet win.
For over 100 Bot, Non-Bot, and Retro Bot Reviews, click here to view my archive.